Last updated: November 17, 2026
Quick Answer: In about 5 minutes, clean the clear sensor window with a dry cotton swab first, then a lightly dampened swab with isopropyl alcohol if the lens still looks cloudy. For How to Clean Infrared Ice Full Sensors on Countertop Units, the usual fix on countertop units is film on the infrared ice full sensor window, not a broken part, so a careful wipe usually clears the false “ice full” reading in a few minutes.
Key takeaways
- A false “ice full” light often comes from a cloudy sensor window, not an actual full basket.
- Start with a dry swab, then use a small amount of isopropyl alcohol on a cotton swab if grime stays put.
- Do not flood the sensor or scrub the lens; the receiver window scratches easily.
- Clean both sides of the optical pair if the model gives access to the infrared LED and photodiode.
- If the sensor still reads full after cleaning, the issue may be alignment, wiring, or a failing sensor module.
What should you clean on the sensor?
You should clean the clear lens, not the electronics behind it. The optical ice sensor usually uses an infrared LED on one side and a photodiode or phototransistor on the other, and the reader only sees through a small acrylic window. A fogged window, mineral film, or splash residue can block the beam and make a countertop unit think the basket is full when it is empty.
That matters because many people wipe the wrong area. The plastic cover around the sensor can look dirty while the actual receiver window sits just inside it, and only that clear path affects the reading. If the sensor window is cracked, deeply scratched, or loose, cleaning will not solve the problem.
A clean sensor should look clear, not polished. The goal is to remove haze in under 5 minutes, not to make the plastic shiny.
How do you clean the optical ice sensor?
You clean the optical ice sensor by wiping the lens gently, drying it fully, and testing the unit again. Use a cotton swab and isopropyl alcohol only on the clear sensor window, then let the part air-dry before you restart the machine.
-
Unplug the countertop unit and open the ice bin access so the sensor area is easy to reach.
Power off first, because a small hand near the ice-making parts is easier to place when the machine is dead. Wait about 1 minute before touching the sensor. -
Inspect the sensor window with a flashlight and look for haze, splash marks, or white residue.
A cloudy ice sensor window usually shows a dull film rather than a hard crust. If you can see dried mineral spots, the lens likely needs a damp wipe, not force. -
Wipe the window with a dry cotton swab using light pressure.
Make 2 or 3 passes only. This removes loose dust without rubbing grit across the acrylic lens. -
Dampen a fresh cotton swab with a small amount of isopropyl alcohol and wipe the lens again.
The swab should be barely wet, not dripping. Focus on the clear receiver window and the matching emitter window if both sides are accessible. -
Dry the sensor with a clean swab and leave it open for about 1 minute.
Alcohol flashes off fast, but the last trace matters. A dry lens gives the infrared LED and photodiode a clear line of sight. -
Restore power and watch one full fill cycle or a test cycle.
If the “ice full” light goes out when the basket is empty, the sensor was likely dirty rather than defective. If the light stays on, move to alignment and obstruction checks. -
Repeat the cleaning only once if the first pass did not clear the reading.
Two light cleanings are safer than one aggressive scrub. If the window still looks cloudy after that, the issue may be damage, not dirt.
This is the same basic fix used in many optical ice sensor setups, including countertop models that rely on a phototransistor ice maker design. The method is simple because the sensor is simple: a clean beam path is what matters. For related care steps, see our ice maker cleaning guide and countertop ice maker troubleshooting.
What should you use and what should you avoid?
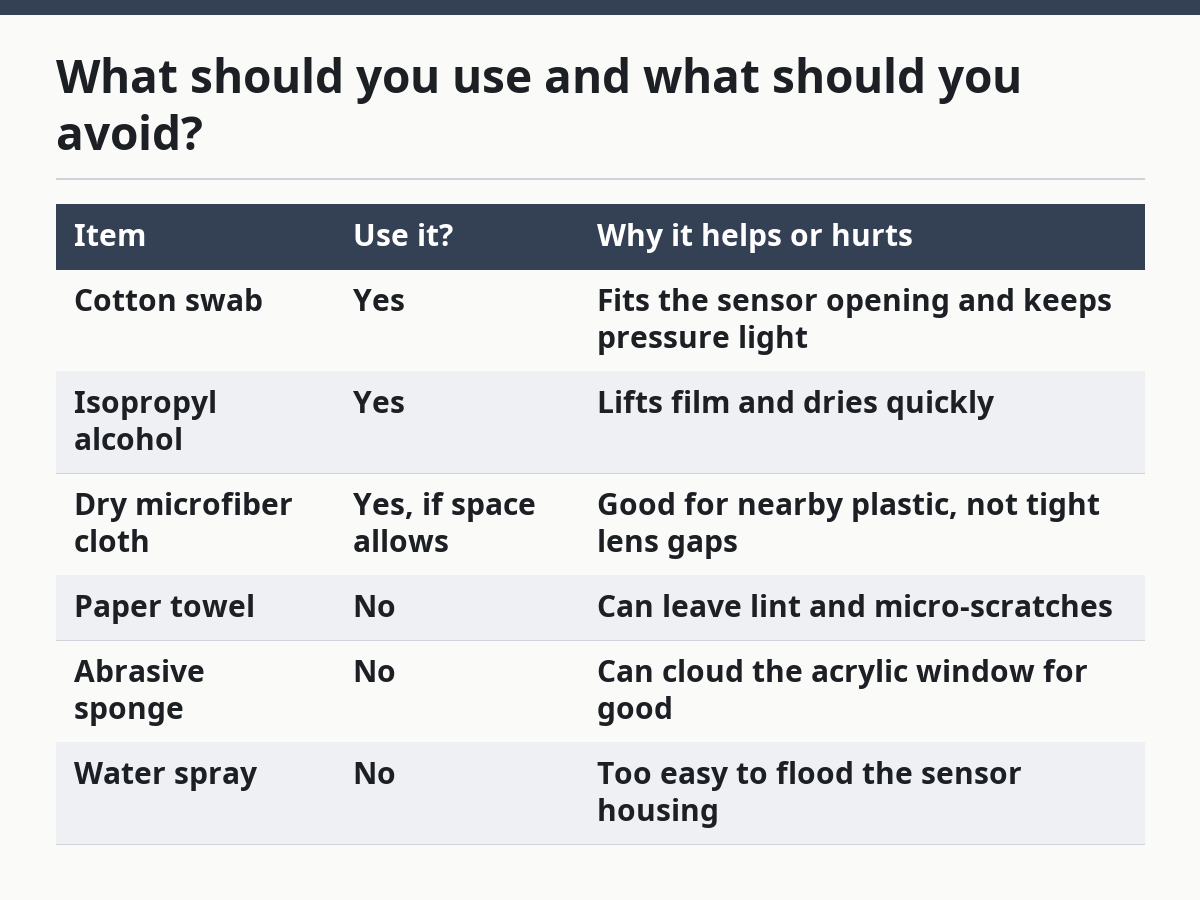
You should use a cotton swab, isopropyl alcohol, and a dry cloth, and you should avoid paper towels, scrub pads, and anything abrasive. A soft swab reaches the small opening without scuffing the lens, while rough fibers can leave scratches that scatter the beam.
| Item | Use it? | Why it helps or hurts |
|---|---|---|
| Cotton swab | Yes | Fits the sensor opening and keeps pressure light |
| Isopropyl alcohol | Yes | Lifts film and dries quickly |
| Dry microfiber cloth | Yes, if space allows | Good for nearby plastic, not tight lens gaps |
| Paper towel | No | Can leave lint and micro-scratches |
| Abrasive sponge | No | Can cloud the acrylic window for good |
| Water spray | No | Too easy to flood the sensor housing |
This choice matters more than most people think. A receiver window that looks only a little hazy can still block the infrared beam enough to trigger a false bin-full reading, and a rough cleaning can make that haze permanent. If the manufacturer says only to use a dry cloth, follow that first.
For general cleaning and disinfecting habits, the CDC cleaning guidance and the FDA’s home food-equipment advice are useful references, but the unit’s own manual still wins on sensor care. The CDC’s cleaning guidance is here: CDC cleaning guidance. The FDA’s home food-equipment advice is here: FDA home food safety. A countertop machine with an exposed optical pair needs a lighter touch than a flat plastic panel, and you can compare that approach with our descaling vs. cleaning guide.
What mistakes cloud the sensor again?
The biggest mistake is soaking the sensor, and the second is rubbing the lens too hard. A wet swab can drive residue deeper into the housing, while a hard rub can scratch the receiver window and make the “ice full” problem come back after every wipe.
Another common miss is cleaning only one side of the sensor pair. If the infrared LED sits on one wall of the bin and the photodiode sits opposite it, both faces need to stay clear. A unit can look spotless from the front and still misread because the opposite side has film, dust, or a thin water spot.
People also mistake frost or splash residue for a dead part. If the basket area is cold and damp, the sensor can pick up condensation on the lens within minutes of cleaning. Wipe it dry, let the chamber sit open for about 1 minute, then restart the machine. If condensation keeps returning, our ice maker maintenance page covers the setup checks that help prevent it.
Do not use vinegar on this page’s problem. That belongs to descaling, not lens cleaning, and acid is the wrong tool for a clear acrylic window. If the sensor is only cloudy, an alcohol wipe is the cleaner match.
When is cleaning not enough?
Cleaning is not enough when the sensor window is scratched, the bracket is out of line, or the machine still shows “ice full” with a fully clear lens. At that point, the issue is no longer surface film; it may be a failed sensor, loose wiring, or a misaligned emitter and receiver.
A quick check helps sort this out. If the basket is empty, the lens is clear, and the unit still shuts off after a few seconds, the optical path may be blocked by the mounting position rather than dirt. Some countertop units need the sensor face to line up squarely across the bin, and a bump during cleaning can nudge that alignment.
This is the point where a reader should stop short of forcing the part. A cracked acrylic window or loose sensor body can turn a simple fix into a replacement job. If the unit is under warranty, opening the housing may not be worth the risk.
The clean rule is simple: if the lens looks clear after two careful passes and the unit still lies about basket level, the problem is probably beyond cleaning. If you need model-specific help, check the manufacturer’s support page before replacing parts.
Why does my ice maker think the basket is full?
Your ice maker thinks the basket is full when the infrared beam between the emitter and receiver is blocked, scattered, or misread. On many countertop units, a thin layer of mineral film or moisture on the optical ice sensor is enough to fool the photodiode into seeing an obstruction.
That false reading is common when the machine sits near steam, hard-water splash, or sticky ice dust. A cloudy sensor window can act like a partial wall, so the unit stops making ice even though the bin is empty. Cleaning fixes the reading only if the lens is the problem, not the wiring or alignment.
If the machine stops after 2 or 3 cycles but starts again after a wipe, the sensor was likely dirty. If it stops every time, even after cleaning, the sensor system needs a closer look than a cotton swab can give.
Where are the sensors located on a countertop ice maker?
The sensors are usually mounted across the ice bin opening, one emitter on one side and one receiver on the other. On many countertop units, the optical ice sensor sits near the basket walls so the beam can pass through the storage area at a fixed height.
The exact spot varies by model, but the pair is often easy to spot as two small clear or dark windows aimed at each other. If the lens area is behind a plastic shroud, clean only the visible window and do not pry at the housing.
Why does my ice maker think the basket is full?
Your ice maker thinks the basket is full when the optical path is blocked or the sensor reads the wrong signal. Dirt, condensation, or a scratched lens can stop the infrared beam from reaching the photodiode or phototransistor correctly.
If the basket is empty and the light still stays on after cleaning, the issue may be alignment or a failing sensor module rather than surface grime. In that case, a manual for the exact model is the next stop, because the fix can shift from cleaning to inspection.
What should you remember before the next cleaning?
You should remember that this job is about clarity, not force. A dry cotton swab, a small amount of isopropyl alcohol, and a minute of patience solve many false “ice full” readings on countertop units without touching the rest of the machine.
The optical sensor is small, but the effect is not. A cloudy lens can stop ice production as surely as an actually full basket, and a scratched window can keep causing trouble long after the first wipe. If the lens looks good and the error remains, the sensor has moved from a cleaning problem to a repair problem.
Drafted with AI; not yet reviewed by a person.